Performance optimization is an important part of your overall website strategy. A website's performance can affect user abandonment rates and your search rankings on Google.
Unfortunately, website optimization is not a magic pill, plugin, or a one-time service you can simply sign up for. It is an ever-growing systematic process that is crucial to your company's success.
Below are seven technical optimization tweaks you can start implementing today in order to streamline your website performance and keep you ahead of your competition.
1. Reduce your HTTP(S) Requests
If you’re reading this blog, congratulations, you have already made one of many HTTP(s) requests! When a web browser loads a web site, that site makes requests (these are usually GET Requests) to pull back resources from the server(s) in order for the user’s browser to load the content onto the page. Let’s see an example of this using the homepage for Staples®:

As you can see in the above (taken from Pingdom), the more resources you have on your website and the more requests your site makes, the longer it will take the site to load for the user.
So what are some ways we can reduce the HTTP(S) requests?
-
A. Combine CSS files and JS Files
Websites often include many different CSS and Javascript files. Each file requested adds to the load time. Build tools like Gulp and technologies like SASS can work to combine files together so your site doesn't have to connect to as many resources. This allows you to keep your files separated for programming purposes, but when the webpage loads, the tools do the heavy lifting of file merging and the page is served with fewer calls to these resources.
For those developers who do not have these technologies available to them, make sure you evaluate whether the files you are requesting are needed on the pages that are loading. A prime example of this would be for sites that user a banner rotator (such as Slick Slider) on their homepage but include the call to the library’s resources on every page. This means that pages that don’t require the slider are loading it needlessly. A more optimal solution would be to only load resources when they are needed.
-
B. Minify your CSS and JS Files
Now that you have your files combined (either through present technologies or manually), your next step would be to “minify” these files. Minifying simply refers to removing unnecessary whitespace and comments from your file and condensing your code down to as few lines as possible. The example below shows a comparison of jQuery 2.2.4 from Google’s Hosted Libraries in its un-minified and minified states.
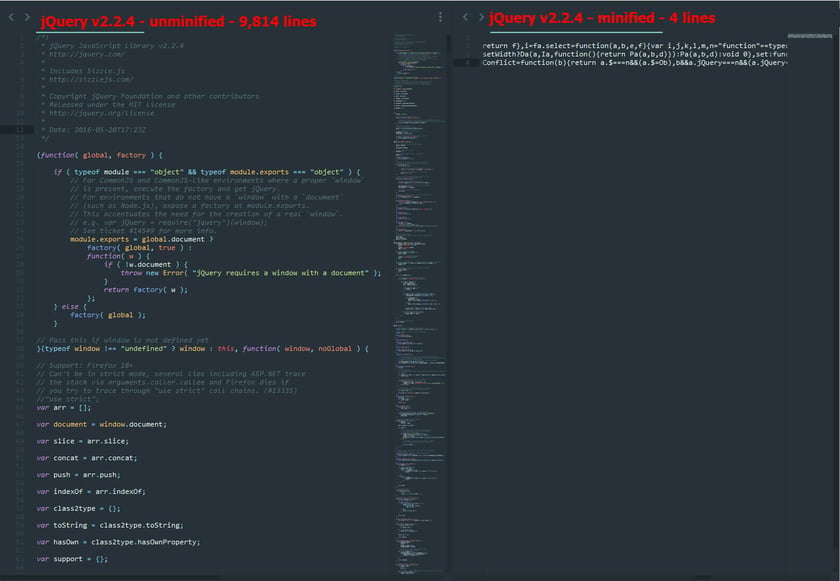
Notice how the un-minified version has over 9,500 lines that must be read in order to render. The minified version has 4 lines. This would be an equivalent of reading a screenplay complete with stage directions versus simply watching the movie/show.
Referring back to our preview point (A) some content management systems (referred to as CMS) offer minification built in (such as HubSpot). For those using a CMS without minification available, there are several services online for minifying your files. One such service is Minifier.org
Note: Looking to un-minify a file? Try using DitryMarkup. It will let you paste minified content in and then automagically clean it up and make it easier to read.
-
C. Use image sprites where you can
Image sprites are a collection of images rolled into one giant image. The benefit of this is that the image is only requested from the server once. Through the use of the background-position CSS property, you can control which portion of the sprite is visible. There is no official "must use" format, such as JPG or PNG, for the image sprite. However, many lean towards using the PNG format because of its lossless compression and transparent background capabilities. One such example of an image sprite is YouTube’s image sprite which can be seen below:
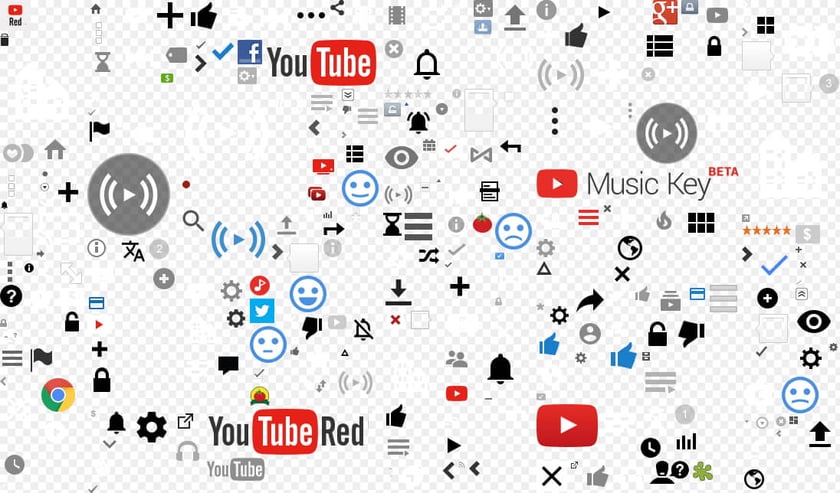
One thing you may have noticed from the image sprite above is the type of images that are used inside of the sprite. Image sprites are mainly used for common elements on a site such as a logo, pagination, icons, buttons, or other interface elements. For a more in depth look at image sprites, TutsPlus has a great article called CSS Sprite Sheets: Best Practices, Tools and Helpful Applications.

2. Reduce render blocking resources
Before the browser can render a page it has to build its DOM (Document Object Model) and construct its CSSOM (CSS Object Model). When building a DOM, every time the page encounters a <script>it has to (if externally linked) fetch this resource then execute it before it can proceed to build the page. The same happens with building the CSSOM as it has to load all of the <style>'s on a page (and fetch them if linked externally). By combining CSS and JS files in the previous step we accomplish some reduction of render blocking by removing multiple calls to files.
To further this, there are a few more ways in which you can go about reducing render block for JavaScript and CSS files. Google has a nice write up on their Insights Page References about Removing Render-Blocking Javascript for your site. They cover three options that include inlining your smaller code where you can, using asynchronous loading, and deferring your JavaScript. When working with CSS, Google Web Performance Engineer Ilya Grigorik has an amazing article about Render Blocking CSS that discusses using CSS media types and media queries.
3. Only include JavaScript plugins/libraries on the pages that use them.
We touched on this briefly above in point 1A, but it is worth mentioning again as this is often overlooked. If you are not combining (or you can't because you are using hosted libraries) your JS files, another way to optimize your site is to load certain libraries (such as Slick Slider, FancyBox, etc…) on pages that use them. In previous versions of Modernizr.js, you were able to accomplish this due to the inclusion of yepnope.js (which has since been deprecated). In the newest version of Modernizr yepnope.js has been removed. Luckily, Mark Ho-Kane has written a post on Medium titled Modernizr ditched Yepnope.js: How to load your polyfill which shows you how to accomplish this using Modernizr and JQuery’s “.getScript” function.
4. Use a CDN (Content Delivery Network)
Simply put, a CDN is a network of servers in multiple areas with the goal of distributing content to end users with better deliverability and performance. Below is an image representing the difference between a single server distribution of a website and using a CDN:
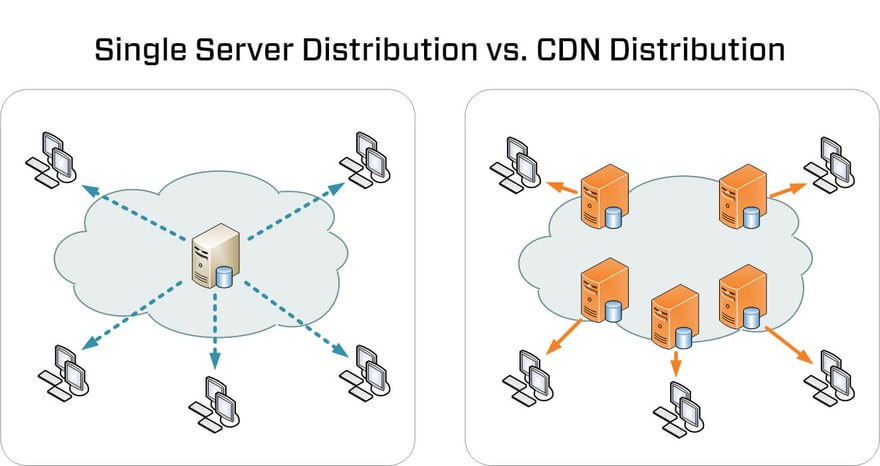
Using a CDN can help to optimize load times of files and other resources (images, videos, documents) by distributing these assets over the delivery network and making it easier for users to access them. To give an example of how a CDN works, let’s take a look a banking institution and ATM machines. We would have the following:
-
The bank = Your website
-
ATM machine = Your server
-
Money = Your content (see what we did there)
-
Two people = End users of your website
Let’s say we have two individuals named James and Susan. James lives in a big city exactly one block away from the main bank and Susan lives in the suburbs of the city about 30 minutes away. The bank only has one ATM located in the main bank where all bank patrons can withdraw money from. If both Susan and James leave their house at the same time to take out money from the ATM, who would get their money first? The answer is James since he is closest to the ATM. Susan is also able to get money from the ATM, but it would take a bit longer because of her commute.
Now, let's say the bank installs a second ATM machine exactly a block away from Susan in the suburbs. Now, who would get the money first? Simply put, they would both get there at the same time and essentially get their money in tandem. This example illustrates exactly how a CDN operates. It provides locations across areas where your content is reached at a faster rate by your end users.
5. Optimize your images
For sites that have hero images or image intensive design, image optimization is a necessity in order to increase the performance of your site. Make sure you are choosing the correct size image (this will vary for different components and it is best to review your projects content guidelines for recommended sizes/dimensions) as well as reducing the image file size in a way that doesn’t sacrifice the fidelity of the image or impact clarity. Luckily there are many of sites that can help with image compression while helping you maintain a high quality. One fan favorite is Tinypng.com with others such as Optimizilla and Kraken. To learn more on image optimization and why it's important, you can review Google's PageSpeed Insights Documentation on Optimizing Images.
6. Prefetch links and resources
Prefetching is part of several types of optimizations you can make for browsers known as Resource hints. Resource hints are used to guide the browser’s decisions when it comes to which optimizations to make when loading a page. While there are different types of hints we can use, we’ll focus simply on dns-prefetch as this is the most widely supported resource hint in modern browsers.
DNS prefetching allows the browser to perform DNS lookups in the background while the page loads. According to the Mozilla Developer Network:
DNS requests are very small in terms of bandwidth, but latency can be quite high, especially on mobile networks. By speculatively prefetching DNS results, latency can be reduced significantly.
You can add DNS prefetching by adding the tag [rel="dns-prefetch"] to a <link> attribute and setting the href to the domain you are looking to prefetch. For example:
<link rel="dns-prefetch" href="//domain_to_prefetch.com">
A nice use case for this would be if you are using a separate domain to host your images. Referring back to the Mozilla Developer Network:
...If the domain names for images can be resolved in advance of the images being requested, pages that load many images can see an improvement of 5% or more in the time of loading images.
7. Review web font usage and selections
A majority of websites have now taken to using hosted web font services such as Google Fonts, Typekit, or Fonts.com. While these have added to the design arsenal and allowed us to use various typographical styles on websites, it’s important to use them in an optimal way, as they can greatly increase load times if used incorrectly. When choosing fonts, make sure you are only loading the font faces and styles currently in use. Loading an entire font family list, such as Roboto, which has 12 styles, can take longer to load.
These services are also render blocking and you can use the previous method of dns-prefetch in combination with them to help optimize delivery. An example of this is:
<link rel="dns-prefetch" href="//fonts.googleapis.com/">
In Conclusion
Overall, website performance optimization is a process you need to keep up with as your site begins to evolve further. There will always be new ways, services, and technologies that rise up to either replace or add on to existing ways. It’s best to analyze your site and perform an internal audit to see which areas you can improve upon for performance optimization. Once you have those key areas identified, you can then begin to assign priority to these items and start on the path to a faster loading performance optimized website.